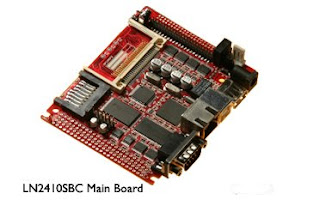
Introduction
There are many blog on net which are introducing porting Linux on LN2410,I tried their way,I was able to boot linux and filesystem, however I was not sucessfull in enabling the touch screen driver on the board.This is an attempt to fill those gap.
Before we start with setting the enviroment we need to ensure that we have all the necessary source code and bineries required to set up the host enviroment are availble on the system.
Download Files
Cross compiler
gnu-arm-2005QIB-arm-none-linux-gnueabi-i686-pc-linux-gnu-1.tar.bz2
cross-2.95.3.tar.bz2
Linux Source code:
linux-2.6.13.2.tar.bz2
Patch for LN2410
patch-2.6.13.2-ln2410sbc-0.6.gz
We need to one more patch to enable the touch screen funtionality,this is created by Mr. Ragrot and can be downloaded from below link
Patch for LN2410 by Mr. Ragrot
ln2410sbc-lc6-patch-rag-04-28-07.bz2
UBoot source
uboot-1.1.1-ln2410sbc-0.3.tar.gz
Microwindows
a. microwindows-0.90.tar.gz
b. microwindows-fonts-0.90.tar.gz
c. patch-0.90-lc1.gz
Root file system
LN2410disk.gz
The kernel compilation steps :
a. Environment.
b. Compilation.
c. Flashing to Memory.
a. Environment
extract 'gnu-arm-2005QIB-arm-none-linux-gnueabi-i686-pc-linux-gnu-1.tar.bz2' to /usr/local/arm/release-3.4.3
$setenv GCC_ARM_HOME /usr/local/arm/release-3.4.3
$set path=($GCC_ARM_HOME/bin:/$path)
b. Compilation
Extract the kernel and apply above two patches
# bunzip2 -dc linux-2.6.13.2.tar.bz2 | tar xvf -
# gzip -dc patch-2.6.13.2-ln2410sbc-0.5.gz | (cd linux-2.6.13.2;patch -p1)
# bunzip2 -dc ln2410sbc-lc6-patch-rag-04-28-07.bz2 | (cd linux-2.6.13.2;patch -p1)
# cd linux-2.6.13
# make menuconfig
# make
If it is a successful compilation you will have zImage file in arch/arm/boot directory.
extract the uboot source
# cd uboot-1.1.1
# cd tools
#./mkimage -A arm -T kernel -O linux -a 0x30f00000 -e 0x30f00000 -n "Linux 2.6.13" -d /path/to/zImage /path/to/zImage.bin
c. Flashing it to memory
Go to terminal type 'kermit' to now to get the uboot command line type 'connect'
I assume that you have installed the kermit and configured it.
To return to kermit prompt by pressing 'Ctrl + \' and 'u'
To send a file from kermit prompt type send
LN2410SBC # loadb 0x31000000
transfer the file with Kermit, it takes a few minutes.
now return to uboot prompt and type
LN2410SBC # erase 1:7-33
This erase the sectors from 7 to 33
Copying zImage from DRAM to Flash:
LN2410SBC # cp.b 0x31000000 0x40000
The File system compilation steps :
a. Environment.
b. Microwindows Compilation.
c. Copy the root filesystem to host
a. Environment
extract 'cross-2.95.3.tar.bz2' on /usr/local/arm/2.95.3
$setenv GCC_ARM_HOME /usr/local/arm/2.95.3
$set path=($GCC_ARM_HOME/bin:/$path)
b. Microwindows Compilation
i. Install microwindows-0.90, fonts and patch
$ tar xvfz microwindows-0.90.tar.gz
$ cd microwindows-0.90 /src
$ tar xvfz ../../microwindows-fonts-0.90.tar.gz
$ cd ../..
$ gzip -cd patch-0.90-lc1.gz | (cd microwindows-0.90; patch -p1)
ii. Build and install binaries
$ cd microwindows-0.90/src
In config file do the following changes
ARMTOOLSPREFIX = arm-linux-
In Mouse driver section
NOMOUSE =N
IPAQMOUSE =Y
For PCF font error:
Modify: HAVE_PCF_SUPPORT = N
HAVE_PCFGZ_SUPPORT = N
PCF_FONT_DIR = “fonts/pcf”.
$ which arm-linux-gcc /* make sure tool is available */
/usr/local/arm/2.95.3/bin/arm-linux-gcc
$ make
$ mkdir ../install
$ make INSTALL_PREFIX=../install install
iii. Create new file system
Copy files from RAMdisk image to new disk image
$ unzip LN2410disk.gz
$ mount -o loop LN2410disk olddisk
$ mkdir newdisk
$ copy -a olddisk/* newdisk
iv. Copy Microwindows binary files to new disk
$ copy -a microwindows-0.90/install/* newdisk
c. Root filesystem on host(SD MMC card or USB drive)
See me blog on 'Root file system on SD-MMC card' for details
Boot kernel:
LN2410SBC # bootm 0x40000
Running NANO-X/Micro-windows
On BusyBox shell window,type following commands to start Nano-X
$ mknod /dev/null c 1 3
$ mknod -m 660 /dev/h3600_ts c 13 128
$ mknod -m 666 /dev/h3600_tsraw c 13 144
$ nano-X & /* start nano-X server */
$ nanowm & /* Window manager */
$ nxcal & /* touch screen calibration tool */
$ ntetris & /* play tetris! */