Friday, December 11, 2009

Qt Application development on mini2440

Introduction

This blog emphasize on building QT based GUI application for embedded linux , Its describes on setting up the IDE for QT ,cross compiling QT 4.5 libraries for embedded application on mini2440 board in particular.


Setting QT Creator (IDE).

Qt Creator is a new cross-platform integrated development environment (IDE) tailored to the needs of Qt developers, Qt SDK includes the tools you need to build cross-platform applications with Qt in a single install.

Qt libraries

Qt Creator IDE

Qt development tools


Use the below link to download Qt SDK.

http://get.qt.nokia.com/qtsdk/qt-sdk-linux-x86-opensource-2009.05.bin

Login as root to the host machine and run the the binary file on the command promt.

LinuxHost>chmod +x qt-sdk-linux-x86-opensource-2009.05.bin

LinuxHost>./qt-sdk-linux-x86-opensource-2009.05.bin

Now once the installation is complete,run the QT Creator by clicking on desktop icon.


Navigate Tools->Options

Select the Qt installation path, in my case it is PATH “/opt/qtsdk-2009/qt”.

Now click on rebuild button to configure it,on success Qt creator will check the 'Debugging Helper'

The IDE is set to develop QT application for the Host machine.


Cross compilation of QT 4.5.3 for mini2440 board.

  1. Download the compressed package

http://qt.nokia.com/downloads/embedded-linux-cpp

now extract qt-embedded-linux-opensource-src-4.5.3.tar.gz to an appropriate folder and configure the source,it is assumed that the cross compiler is installed and the path is updated in the environment variable.


\path-to-mini2440\>tar -zxvf qt-embedded-linux-opensource-src-4.5.3.tar.gz

\path-to-mini2440>cd qt-embedded-linux-opensource-src-4.5.3

\path-to-mini2440\qt-embedded-linux-opensource-src-4.5.3>:


2. Compile the qt-embedded-linux-opensource-src-4.5.3. Remove some unnecessary features, keep most of the commonly used functions, and add support for the tslib touch screen recalibration.

./configure \
-prefix /new_disk/Hiteg/qt/build/ //specify the directory for installation,
-release -shared \
-fast \
-pch \
-no-qt3support \
-qt-sql-sqlite \
-no-libtiff -no-libmng \
-qt-libjpeg \
-qt-zlib \
-qt-libpng \
-qt-freetype \
-no-openssl \
-nomake examples -nomake demos -nomake tools \
-optimized-qmake \
-no-phonon \
-no-nis \
-no-opengl \
-no-cups \
-no-xcursor -no-xfixes -no-xrandr -no-xrender -no-xkb -no-sm \
-no-xinerama -no-xshape \
-no-separate-debug-info \
-xplatform qws/linux-arm-g++ \
-embedded arm \
-depths 16 \
-no-qvfb \
-qt-gfx-linuxfb \
-no-gfx-qvfb -no-kbd-qvfb -no-mouse-qvfb\
-qt-kbd-usb \
-confirm-license \
-qt-mouse-tslib

$ make (or gmake)
$ make install (or gmake install)
3.Build filesystem, copy necessary Qt libraries to the filesystem directory:
cd $rootfs #$rootfs is the filesystem directory

mkdir new_disk/hiteg/qt/build –p && cd new_disk/hiteg/qt/build
cp /new_disk/hiteg/qt/build/lib/libQtCore.so ./
cp /new_disk/hiteg/qt/build/lib/libQtGui.so.4 ./
cp /new_disk/hiteg/qt/build/lib/libQtNetwork.so.4 ./
mkdir fonts

copy the fonts that you want to implement in your Qt:

cp /mnt/qt/build/lib/fonts/xxxxx.qpf fonts


Installing tslib library on mini2440


  1. Where to download tslib source code.
    addr1 http://www.zelow.no/floppyfw/download/Development/src/(I suggest use this one)
    addr 2 http://mail.pdaxrom.org/download/1.1.0beta3/src/

2. How to compile
We've to manual set some enviroment virables. and correctly configure the source code. I show you a build file wrote myself:
#step 1 play a trick
echo "ac_cv_func_malloc_0_nonnull=yes" > arm-linux.autogen

#step 2 set the enviroment
export CC=/cross-compile/bin/arm-linux-gcc
export CXX=/cross-compile/bin/arm-linux-g++
export CONFIG_SITE=arm-linux.autogen
#step 2
./configure --build=i386-linux --host=arm-linux --target=arm --disable-inputapi --prefix=/new_disk/Hiteg/qt//build

do make and make install,you will get what you want under ./build. Actually you can set the prefix as your root_fs befor hand then after the "make install" these file are stay on position.


3. Copy the libraries to the standard library path in file system and make it available to the application.

3.1 initialize the environment setting first, you'd better place them in /etc/profile or other place you like.
QTDIR=/new_disk/Hiteg/qt-arm/build
LD_LIBRARY_PATH=$QTDIR/lib
TSLIB_CONSOLEDEVICE=none
TSLIB_FBDEVICE=/dev/fb0
TSLIB_TSDEVICE=/dev/input/event0
TSLIB_CALIBFILE=/etc/pointercal
TSLIB_CONFFILE=/usr/local/etc/ts.conf
QWS_SIZE=240x320
QWS_DISPLAY="LinuxFb:mmWidth135:mmHeight155"
QWS_MOUSE_PROTO="Tslib:/dev/input/event0"
TSLIB_PLUGINDIR=$QTDIR/lib/ts
export USER LOGNAME PS1 PATH
export QTDIR
export LD_LIBRARY_PATH
export TSLIB_CONSOLEDEVICE
export TSLIB_FBDEVICE
export TSLIB_TSDEVICE
export TSLIB_CALIBFILE
export TSLIB_CONFFILE
export QWS_SIZE
export QWS_DISPLAY
export QWS_MOUSE_PROTO
export TSLIB_PLUGINDIR

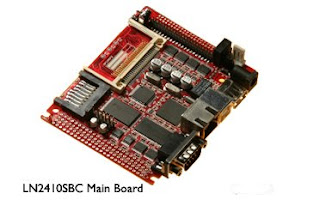
Monday, September 14, 2009

Porting uClinux 2.6 on AX4510


This section is about porting uClinux on ARM 7 based S3c4510 samsung processor.


About AX4510
This is ARM7 Development Board based on Samsung S3C4510B Microcontroller
  • Dimensions: 177 x 130 mm
  • 5.0V DC or USB power supply
  • 4 M bytes Flash(2M x 16bit)
  • 16 M bytes SDRAM(2M x 32bit)
  • 2K x 8 EEPROM
  • 2x RS232
  • USB connecter
  • 10M/100M Ethernet interface connector(RJ45)
  • IDE44 port: for 2.5" hard disk
  • LCD port
  • 2 PS2 port
  • 4 key buttons
  • Reset button
  • 4 LEDS
  • Beeper
  • 20-pin JTAG interface connector
  • all the pins of CPU expand out


About uClinux
uClinux as an operating system includes Linux kernel releases for 2.0 2.4 and 2.6 as well as a collection of user applications, libraries and tool chains,it basically meant to support processor without Memory Management unit.


Essential Tools and Source for Download.
arm-elf-tools-20040427.sh
GCC 2.95.3 with linux 2.6 patch and binutil 2.14 based ARM-ELF toolchain which is made based linux 2.6.5-hsc2 is available for kernel and userland applications compile.It compiles the 2.4 kernel and applications.

uClinux-dist-20040218.tar.gz distribution, this is a full source package, containing kernel, libraries and application code.

linux-2.6.9 vanilla kernels and adds patches relevent to AX4510 http://www.kernel.org/pub/linux/kernel/2.6/linux-2.6.9.tar.bz2

uClinux patch for linux-2.6.9

http://www.uclinux.org/pub/uClinux/uClinux-2.6.x/linux-2.6.9-uc0.patch.gz

MMU less ARM patch -
Name: Hyoks patch
http://opensrc.sec.samsung.com/download/linux-2.6.9-uc0-hsc0.patch.gz


Steps to build the image and downloading to ram.
1.extract uClinux distribution and remove all the existing linux kernel versions.
  • tar -zxvf uClinux-dist-20040408.tar.gz
  • cd uClinux-dist-20040408
  • rm -rf linux-2.0.x linux-2.4.x linux-2.6.x
2. Extract these patches and apply them one after another.
  • gunzip -d linux-2.6.9-uc0.patch.gz
  • gunzip -d linux-2.6.9-uc0-hsc0.patch.gz
  • \linux-2.6.x> patch -p1 < ../linux-2.6.9-uc0.patch
  • \linux-2.6.x> patch -p1 < ../linux-2.6.9-uc0-hsc0.patch
3. Copy relevent configuration files in vendor directory
  • \uClinux-dist-20040408>cp linux-2.6.x/arch/armnommu/configs/espd_4510b_defconfig vendor/Samsung/4510B/config.linux-2.6.x
  • \uClinux-dist-20040408>cp vendor/Samsung/4510B/config.vendor-2.4.x vendor/Samsung/4510B/config.vendor-2.6.x
4. edit 'vendor/Samsung/4510B/rc' file in uClinux-dist directory, change '/dev/ram0' to '/dev/ram1'

5. Edit the Kernel linker file to include the ROMFS

edit file 'linux-2.6.x/arch/armnommu/arch/kernel/vmlinux-lds.S', Add the below lines

  • 81 *(.got) /* Global offset table */
  • 82
  • 83 romfs_start = .;
  • 84 romfs.o
  • 85 romfs_end = .;


6. Configure the kernel using menuconfig,
Block devices --->Default RAM disk size (kbytes) to 2100
General setup ---> (root=/dev/ram0 initrd=,2100k keepinitrd) Default kernel command string

Note:
start address of ramdisk can be determined only compilation of uclinux,
this information can retrieved from System. map file after it is build. so I needed to recompile the uClinux with the updated ramdisk start address.
  • make lib_only
  • make user_only
  • make romfs
  • make image
  • make all
7. image.ram is created in images folder of the distibution and this can be downloaded to ram using tftp.

  • \uClinux-dist-20040408>cd images/
  • \images>tftp 192.168.1.2
  • \images>put image.ram

Thursday, September 10, 2009

Configuring OPENSER as proxy

OpenSer is easily configurable and modular, the necessary configuration is done in openser.cfg. This take care of the incoming SIP messages and routing them to server address configured.The proxy also makes a few checks (and modifications) on the message and sends an error message if necessary.


Edit the Makefile, and at line 287 change this instruction:

Install: all mk-install-dirs install-cfg install-bin install-modules \
install-doc install-man

To

Install: openser mk-install-dirs install-cfg install-bin install-modules \
install-doc install-man

Now, making sure that you have super-user privileges, execute:

> make install
Setting up the OpenSER proxy
Edit openser.cfg

# ----------- global configuration parameters ------------------------

#Uncomment these lines to enter debugging mode
debug=9 # debug level
Fork=no
Log_stderror=yes


check_via=no # (cmd. line: -v)
dns=no # (cmd. line: -r)
rev_dns=no # (cmd. line: -R)
listen= ip this pc will listen on
port=5060
children=4
fifo="/tmp/openser_fifo"
load modules and set parameters

# ------------------ module loading ----------------------------------

# Uncomment this if you want to use SQL database
loadmodule "/usr/local/lib/openser/modules/mysql.so"

loadmodule "/usr/local/lib/openser/modules/sl.so"
loadmodule "/usr/local/lib/openser/modules/tm.so"
loadmodule "/usr/local/lib/openser/modules/rr.so"
loadmodule "/usr/local/lib/openser/modules/maxfwd.so"
loadmodule "/usr/local/lib/openser/modules/usrloc.so"

loadmodule "/usr/local/lib/openser/modules/registrar.so"

# ----------------- setting module-specific parameters ---------------

# -- usrloc params --

# Uncomment this if you want to use SQL database
# for persistent storage and comment the previous line
modparam("usrloc", "db_mode", 0)

# -- rr params --
# add value to ;lr param to make some broken UAs happy

modparam("rr", "enable_full_lr", 1)
Changes in main routing logic
replace
if (method=="REGISTER") {..}
with
if (method=="ACK") {
route(1);
exit;
} if (method=="INVITE") {
route(3);
exit;
} else if (method=="REGISTER") {
route(2);
exit;
};


Add the route[2] and route[3] function for proxy behaviour in openser.cfg


route[2] {
#rewrinting the host allows the registrar to know that the message is destined for it
rewritehost("192.168.1.103"); # openser server ip address
if(!t_relay_to_udp("192.168.1.103","5060")) {
sl_reply_error();
};
exit;
}

route[3] {
# -----------------------------------------------------------------
# INVITE Message Handler
lookup("aliases");
if (uri!=myself) {
route(1);
exit;
};
if (!lookup("location")) {
sl_send_reply("404", "User Not Found");
exit;
};


Now use this configuration script in 'usr/local/etc/openser/'

Thursday, August 27, 2009

Porting openSER 0.9.5 Server on LN2410 baord

About SIP

SIP is an application-layer protocol used to establish, modify, and terminate sessions or multimedia calls. These sessions can be conferences, e-learning, telephony over the Internet, and similar applications.


The SIP protocol supports five features for establishing and closing multimedia sessions.

  • User location: Determines the endpoint address used for communication.

  • User parameters negotiation: Determines the media and parameters to be used.

  • User availability: Determines if the user is available or not to establish a session.

  • Call establishment: Establishes the parameters for caller and callee, and informs on call progress (ringing, ringback, congestion) to both parties.

  • Call management: Session transfer and closing.

SIP Operation Theory

The entire SIP signaling flows through the SIP proxy server. On the other hand, the media signaling, transported by the RTP protocol, flows directly from one endpoint to another.


SIP Entities

  • UAC (user agent client)—Client or terminal that starts the SIP signaling.

  • UAS (user agent server)—Server that responds to the SIP signaling coming from a UAC.

  • UA (user agent)—SIP terminal (IP phone, ATA, softphone).

  • Proxy Server—It receives requests from a UA and transfers them to another SIP proxy if this specific terminal requested is not under its domain.

  • Redirect Server—This receives requests and sends back to the caller including data about the destination, instead of sending directly to the callee.

  • Location Server—This provides the callee's contact addresses to Proxy and Redirect Servers.


Openser-0.9.5 is older version of opensips and is compatible with gcc 2.95 cross compiler used for building the filesystem of LN2410, hence this version is used for porting openser on LN2410 board

Requirements
----------------
a. cross-2.95.3.tar.bz2(gcc cross compiler version 2.95)
b. Openser-0.9.5
c. flex 2.5.33

Flex cross compilation
a. Download flex source code and follow the steps to configure and build the library.
(It is assumed that cross compiler is installed and path is set in shell enviroment.)
tar -zxvf flex-2.5.4a.tar.gz (http://flex.sourceforge.net/)
cd flex-2.5.4
mkdir /home/guest/flex_lib
this folder is used save flex library.
b. ./configure --prefix=/home/guest/flex_lib --build=i686-pc-linux-gnu --host=arm-linux --target=arm-linux CC=arm-linux-gcc
c. Changes in Makefile
CC = arm-linux-gcc
AR = arm-linux-ar
RANLIB = arm-linux-ranlib

d. make prefix=/home/guest/flex_lib all
e. make prefix=/home/guest/flex_lib install

openser-0.9.5 cross compilation

a. download openser-0.9.5 and perform the steps to cross compile and build the executable
tar -zxvf openser-0.9.5_src.tar.gz (http://www.openser-project.org/pub/openser/)
b. Changes in Makefile.def
RELEASE=$(VERSION).$(PATCHLEVEL).$(SUBLEVEL)$(EXTRAVERSION)
OS = linux
ARCH = arm
OSREL = 2.6.13.2
#set some vars from the environment (and not make builtins)
CC := arm-linux-gcc
line # 301
DEFS+= $(extra_defs) \
-DNAME='"$(MAIN_NAME)"' -DVERSION='"$(RELEASE)"' -DARCH='"$(ARCH)"' \
-DOS='"$(OS)"' -DCOMPILER='"$(CC_VER)"' -D__CPU_$(ARCH) -D__OS_$(OS) \
-DCFG_DIR='"$(cfg-target)"'\
-DPKG_MALLOC \
-DSHM_MEM -DSHM_MMAP\

line# 847
LIBS= -L/home/guest/flex_lib/lib/ -L /lib -lfl -ldl -lresolv
c. mkdir /openser_lib
d. make prefix=/openser_lib skip_modules="mysql" modules
e. make prefix=/openser_lib install
f. copy the /openser_lib to LN2410 filesystem
cp /openser_lib /media/disc/ -rf

g. changes in /etc/openser/openser.cfg

# ----------- global configuration parameters ------------------------

debug=3 # debug level (cmd line: -dddddddddd)
fork=yes
log_stderror=no # (cmd line: -E)


check_via=no # (cmd. line: -v)
dns=no # (cmd. line: -r)
rev_dns=no # (cmd. line: -R)
port=5060
children=4
fifo="/tmp/openser_fifo"

h. run openser on LN2410
./openser_lib/sbin/openser -m 8
you check the server process using the ps command

Using the server
There are plenty of soft-phone available on the net(e.g ekiga,twinkle) you can select any one of them,install on the PC, for windows user you can use windows messenger client to communicate with other softphone.

Communication can achived in siple steps.
1. Register the Softphones to server.
2. call the other softphone using the uri (sip:2000@192.168.1.103)
note: The server configuration allows registeration is without authentication hence you can register using any user id.

Kermit for Serial communication

Kermit handles both modem and TCP/IP connections,I have used it for serial communication on LN2410,it is simple configure and use compared to minicom.

Download Kermit from below link.
http://www.columbia.edu/kermit/ck80.html#source

To build and install follow the steps below.
1. mkdir Kermit
2. mv /path-tokermit-source/cku211.tar.gz Kermit
3. tar -zxvf cku211.tar.gz
4. make linux
5. make install

create a file ".kermrc" in /root/ folder with the following details and save it.

Contents of ".kermrc" file begins
set line /dev/ttyS0 /* Kermit uses Serial port 0*/
set speed 115200 /* Baud rate on which this operate*/
set carrier­watch off
set handshake none
set flow­control none
robust
set file type bin
set file name lit
set rec pack 1000
set send pack 1000
set window 5

Contents of ".kermrc" file ends

Now connect LN2410 board to PC and type kermit on command line. type connect on command line to get the uboot shell type 'Ctrl' + '\' and 'u' keys to return to kermit prompt

To send a file to LN2410 type 'send /filename' on command promt

Running Telnet daemon on LN2410

The Telnet protocol is one of the simplest ways to log into a remote network host. Consequently, it’s the easiest way to access your target system once it is connected to a network. To enable remote login, your target must run a Telnet daemon. There are two main Telnet daemons available for use in embedded Linux systems: telnetd, which is part of the netkit packages mentioned earlier, and utelnetd, which is maintained by Robert Schwebel of Pengutronix.

The utelnetd package provides a small and efficient stand alone
telnet server daemon. The utelnetd package is small and compact, and
uses less resources than a traditional telnet server daemon, making
it ideal for use on embedded systems, or systems where memory is
limited.

Download utelnet from the link below

http://www.filewatcher.com/m/utelnetd­0.1.6.tar.gz.13869.0.0.html
Extract the Source file from the tarball.
tar ­-zxvf utelnetd­0.1.6.tar.gz

Change the cc option to the cross compiler in the Makefile.
CC = arm­-linux­-gcc
Now compile the file using the make command.

Copy the binaries(utelnetd) to root file system's /bin folder
Now boot the kernel and filesystem up.
Now run the utelnetd server on the board,you can access the board
using the telnet IP Address command from the host PC.


Note:

The Telnet daemon uses pseudoterminal devices, called pty for short,
to provide a terminal for the shell and other programs to run in,
when invoked from the network via this daemon. One of the most common
pitfalls for novice embedded Linux system builders regarding the
Telnet service is to neglect some configuration detail related to
ptys that prevents users from logging in to the system via Telnet.
If the Telnet daemon is running and networking is otherwise working
(you can, for example, ping other hosts), make sure of the following:

The /dev/ptmx exists and that it is a character device file with a
major number of 5 and a minor of 2; if not, create it using the
command:
$ mknod /dev/ptmx c 5 2
• Support for the devpts pseudofilesystem is enabled in the kernel by
looking for the devpts entry in the /proc/filesystems file, or add
the support by turning on the
CONFIG_UNIX98_PTYS Linux kernel build option.
• The /dev/pts directory exists and that the devpts pseudofilesystem
is mounted on it correctly, either by issuing the mount command and
looking for the devpts entry or mounting it using the command:
$ mkdir /dev/pts && mount ­t devpts none /dev/pts

Wednesday, May 27, 2009

Porting Linux 2.6.13 on LN2410


Introduction

There are many blog on net which are introducing porting Linux on LN2410,I tried their way,I was able to boot linux and filesystem, however I was not sucessfull in enabling the touch screen driver on the board.This is an attempt to fill those gap.

Before we start with setting the enviroment we need to ensure that we have all the necessary source code and bineries required to set up the host enviroment are availble on the system.

Download Files
Cross compiler
gnu-arm-2005QIB-arm-none-linux-gnueabi-i686-pc-linux-gnu-1.tar.bz2
cross-2.95.3.tar.bz2

Linux Source code:
linux-2.6.13.2.tar.bz2


Patch for LN2410
patch-2.6.13.2-ln2410sbc-0.6.gz


We need to one more patch to enable the touch screen funtionality,this is created by Mr. Ragrot and can be downloaded from below link
Patch for LN2410 by Mr. Ragrot
ln2410sbc-lc6-patch-rag-04-28-07.bz2

UBoot source
uboot-1.1.1-ln2410sbc-0.3.tar.gz


Microwindows
a. microwindows-0.90.tar.gz
b. microwindows-fonts-0.90.tar.gz
c. patch-0.90-lc1.gz


Root file system
LN2410disk.gz


The kernel compilation steps :
a. Environment.
b. Compilation.
c. Flashing to Memory.

a. Environment
extract 'gnu-arm-2005QIB-arm-none-linux-gnueabi-i686-pc-linux-gnu-1.tar.bz2' to /usr/local/arm/release-3.4.3
$setenv GCC_ARM_HOME /usr/local/arm/release-3.4.3
$set path=($GCC_ARM_HOME/bin:/$path)
b. Compilation
Extract the kernel and apply above two patches
# bunzip2 -dc linux-2.6.13.2.tar.bz2 | tar xvf -
# gzip -dc patch-2.6.13.2-ln2410sbc-0.5.gz | (cd linux-2.6.13.2;patch -p1)
# bunzip2 -dc ln2410sbc-lc6-patch-rag-04-28-07.bz2 | (cd linux-2.6.13.2;patch -p1)
# cd linux-2.6.13
# make menuconfig
# make
If it is a successful compilation you will have zImage file in arch/arm/boot directory.
extract the uboot source
# cd uboot-1.1.1
# cd tools
#./mkimage -A arm -T kernel -O linux -a 0x30f00000 -e 0x30f00000 -n "Linux 2.6.13" -d /path/to/zImage /path/to/zImage.bin
c. Flashing it to memory
LN2410 To Download zImage.bin onboard DRAM through serial port.
Go to terminal type 'kermit' to now to get the uboot command line type 'connect'
I assume that you have installed the kermit and configured it.
To return to kermit prompt by pressing 'Ctrl + \' and 'u'
To send a file from kermit prompt type send /zImage.bin
LN2410SBC # loadb 0x31000000
transfer the file with Kermit, it takes a few minutes.
now return to uboot prompt and type
LN2410SBC # erase 1:7-33
This erase the sectors from 7 to 33
Copying zImage from DRAM to Flash:
LN2410SBC # cp.b 0x31000000 0x40000 /* source, destination, size */

The File system compilation steps :
a. Environment.
b. Microwindows Compilation.
c. Copy the root filesystem to host

a. Environment

extract 'cross-2.95.3.tar.bz2' on /usr/local/arm/2.95.3
$setenv GCC_ARM_HOME /usr/local/arm/2.95.3
$set path=($GCC_ARM_HOME/bin:/$path)
b. Microwindows Compilation
i. Install microwindows-0.90, fonts and patch
$ tar xvfz microwindows-0.90.tar.gz
$ cd microwindows-0.90 /src
$ tar xvfz ../../microwindows-fonts-0.90.tar.gz
$ cd ../..
$ gzip -cd patch-0.90-lc1.gz | (cd microwindows-0.90; patch -p1)
ii. Build and install binaries
$ cd microwindows-0.90/src
In config file do the following changes
ARMTOOLSPREFIX = arm-linux-
In Mouse driver section
NOMOUSE =N
IPAQMOUSE =Y
For PCF font error:
Modify: HAVE_PCF_SUPPORT = N
HAVE_PCFGZ_SUPPORT = N
PCF_FONT_DIR = “fonts/pcf”.
$ which arm-linux-gcc /* make sure tool is available */
/usr/local/arm/2.95.3/bin/arm-linux-gcc
$ make
$ mkdir ../install
$ make INSTALL_PREFIX=../install install
iii. Create new file system
Copy files from RAMdisk image to new disk image
$ unzip LN2410disk.gz
$ mount -o loop LN2410disk olddisk
$ mkdir newdisk
$ copy -a olddisk/* newdisk
iv. Copy Microwindows binary files to new disk
$ copy -a microwindows-0.90/install/* newdisk
c. Root filesystem on host(SD MMC card or USB drive)
See me blog on 'Root file system on SD-MMC card' for details


Boot kernel:
LN2410SBC # bootm 0x40000


Running NANO-X/Micro-windows
On BusyBox shell window,type following commands to start Nano-X
$ mknod /dev/null c 1 3
$ mknod -m 660 /dev/h3600_ts c 13 128
$ mknod -m 666 /dev/h3600_tsraw c 13 144
$ nano-X & /* start nano-X server */
$ nanowm & /* Window manager */
$ nxcal & /* touch screen calibration tool */
$ ntetris & /* play tetris! */

Saturday, May 2, 2009

Porting cURL Library on LN2410

Introduction
cURL library allows you to connect and communicate to many different types of servers with many different types of protocols. libcurl currently supports the http, https, ftp, gopher, telnet, dict, file, and ldap protocols. libcurl also supports HTTPS certificates, HTTP POST, HTTP PUT, FTP uploading (this can also be done with PHP's ftp extension), HTTP form based upload, proxies, cookies, and user+password authentication.
In this section is about how to compile curl in the host
environment and put it them on target machine.

Configuration and Installation
Download and unpack the
cURL package.
Source code of cURL can be obtained from http://curl.haxx.se/download.html
'
cd' to the new directory. (e.g. cd curl-7.12.3)

Now call the configuration script,Be sure and specify the '--host' and
'--build' parameters at configuration time.
The following script is cross-compiling for ARM9 processor using the
cross tool chain 'cross-2.95.3.tar.bz2' on
RedHat Linux.
(Other tool chains has library linking issues)

./configure --prefix=/root/curl --build=i686-pc-linux-gnu --host=arm-linux --target=arm-linux CC=/usr/local/arm/2.95.3/bin/arm-linux-gcc
The '--prefix' parameter
specifies where
cURL will be installed.
CC parameter is the cross compiler toolchain path.
If 'configure' completes
successfully, do 'make' and 'make install' as usual.


Copying the binaries and libraries to root file system
Once the make install is sucessfull,copy the binaries and libraries in curl folder to bin and lib folder respectively on root file system.
now test the libary on the commad line by typing 'curl url'
I got html page as a response when I typed 'curl http://192.168.1.1' on the shell.

[root@test Linux]# curl http://192.168.1.1
401 Unauthorized401 Unauthorized401 Unauthorized401 Unauthorized


Sunday, April 19, 2009

Root filesystem on SD MMC card


Introduction :
Hacking Linux kernel for LN2410 Single board computer

Here I would like to share my experience in porting root File system on the SD MMC card,and configuring the kernel to use it

I have done it in following steps
1. Setting up the environment
2. Kernel compilation and loading it to NOR flash
3. preparing the SD MMC card and File system.
4. Copying the rootfs to SD MMC Card


Requirements :
Toolchain :
gnu-arm-2005QIB-arm-none-linux-gnueabi-i686-pc-linux-gnu-1.tar.bz2
Kernel:
linux-2.6.13.2-lc6.tar.gz
File system:
LN2410disk.gz (provided by vendor)

Setting up the environment:
-Extract the tool chain and update the environment.
Please follow these steps
create an arm folder in "/usr/local" and extract the binaries in this folder
#mkdir /usr/local/arm
#cd /usr/local/arm
#tar –jxvf gnu-arm-2005QIB-arm-none-linux-gnueabi-i686-pc-linux-gnu-1.tar.bz2
update the shell environment by adding the following in .bashrc file
export PATH=$PATH:/usr/local/arm/bin


Kernel compilation and loading it to NOR flash

a. Extract the kernel source and compile it using the menuconfig option.
# tar xvzf linux-2.6.13.2-lc6.tar.gz
#make menuconfig -------- for configuring kernel
CONFIG_CMDLINE="root=/dev/mmcblk0p1 rootfstype=ext2 console=ttySAC0 rw"(kernel command line we used)
In the Kernel command line we convey in command line the type of filesystem, the partition on which the root file system is available
Under character device driver section do select the
<*> MMC support
[ ] MMC debugging
<*> MMC block device driver
< > Winbond W83L51xD SD/MMC Card Interface support
<*> Samsung S3C2410 Multimedia Card Interface support
#make ---------- u will get zimage in (./arch/arm/boot/zimage)
Once the Image is ready copy this image using the following commands.
LN2410SBC # loadb 0x31000000 (Using Kermit send the zimage.bin )
Once the image is copied the size of byte is indicated in the terminal
LN2410SBC # erase 1:7-33
LN2410SBC # cp.b 0x31000000 0x40000 size

preparing the SD MMC card and File system.

# fdisk /dev/sda
To create a new partition that will use up the whole free space, use the command sequence
like this:
Command (m for help): n
Command action
e extended
p primary partition (1-4)
p
Partition number (1-4): 1
First cylinder (1-1011, default 1):
Using default value 1
Last cylinder or +size or +sizeM or +sizeK (1-1011, default 1011):
Using default value 1011

prepare /dev/sda1 for ext2 filesystem
mkfs.ext2 /dev/sda1


Changes in the kernel command line argument
#make menuconfig -------- for configuring kernel
and in CONFIG_CMDLINE="root=/dev/sda1 rootfstype=ext2 rootdelay=10 init=/linuxrc rw"

Coping the rootfs to SD MMC Card

#gzip -dc LN2410disk.gz
#mkdir olddisk
#mount -o loop LN2410disk olddisk
Now mount the newly created partition on SD MMc card on /mnt
#mount /dev/sda1 /mnt
#cp -rf olddisk/* /mnt
Now connect SD MMC card on LN2410 board.

Restart the board and type loadm 0x40000 on shell prompt.

Now the Kernel will mount the file system from SD MMC card!!